M1 CARBINE KING ARMS – Review
Part 2 – Disassembly
The replica requires no special tool, Phillips and flat screwdrivers and hex keys are enough.
1 – Remove the sling holder by loosening the screw without needing to remove it completely.

2 – Slide the sling holder forward.

3 – Remove the upper handguard.

4 – Remove the Phillips screw that holds the barrel on the stock.


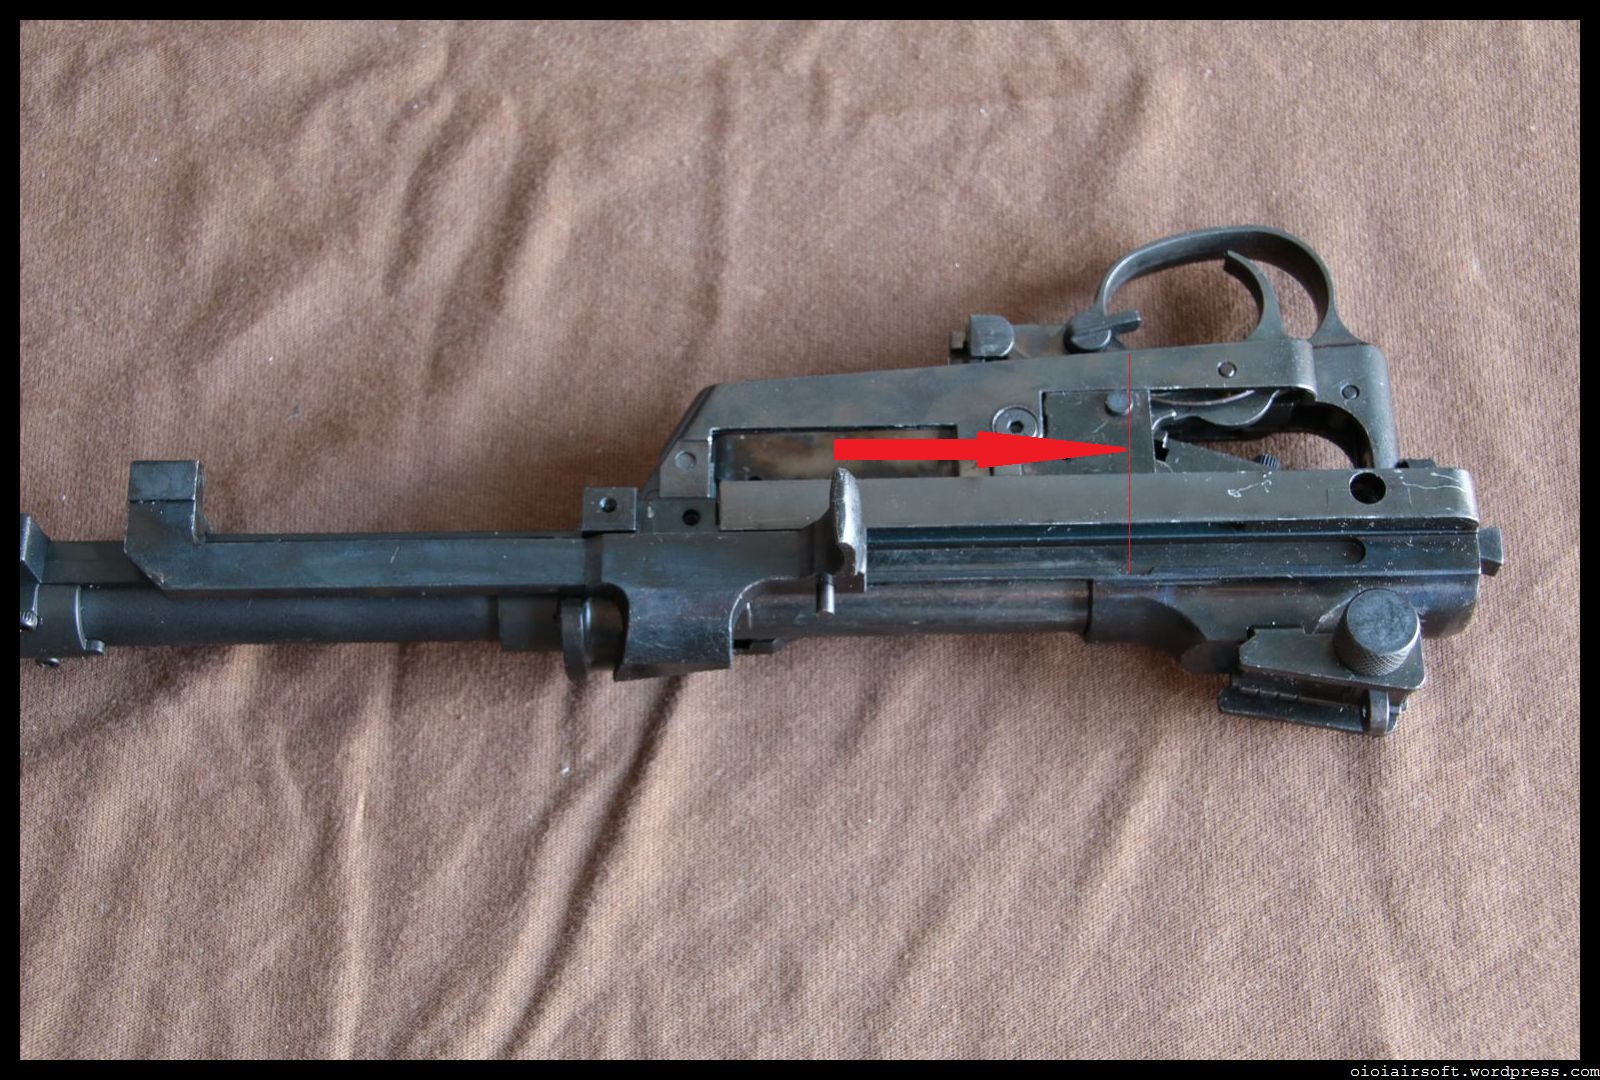
5 – Remove the screw on the back of the receiver.


6 – Put the replica on her left side and gently remove the mechanics from the stock.


7 – Remove the spring guide rod, his cap and the spring.


8 – Remove the screw under the rear sight on the right side.


9 – Remove the two screws on the left side of the receiver.


10 – Put the replica on her left side and move back the cocking lever until the notch.
11 – Spread slightly the two parts of the receiver, just enough so that the cocking lever is no longer maintained in its tracks.

12 – Remove the cocking lever from its tracks.


13 – Separate the two parts of the receiver.


14 – Set aside the slide and its nozzle.


15 – Do not lose this rubber part.


16 – Remove the 2 screws that hold the barrel on the receiver.


17 – Same for the screws of the hop-up unit.


18 – Just remove the barrel.


19 – Separate the outer and inner barrel. You feel the scam made in King Arms?

20 – Remove sling holder and bayonet lug. It is also possible to remove them from the start by removing the front sight.

21 – You can remove the front sight by unscrewing the hex screw. But as it’s pretty boring to properly readjust it, do it only if it is not well placed!


22 – For the rear sight, remove the pin at the end of the adjusting screw and unscrew it. Be careful not to lose the small pin and spring that are in the head of the big screw.


23 – And remove the two Phillips screws.


And now your M1 Carbine is disassembled. I have not dismantled the trigger assembly that seems complex and that don’t necessarily require a disassembly unless it breaks.
Those who have already dismantled a Marushin M1 will not be disturbed. There are a few minor differences that do not change much … That’s the problem! I will detail all this in the next chapter.
Oioi.


Pingback: M1 Carbine King Arms – Démontage/Disassembly – FR & EN | oioiairsoft
thanks for this info about the carbine usm1
LikeLiked by 1 person
Thanks this is verry Helpfull, so it will be no problem for me to put a Ammo pouch on the Rifle.
LikeLike
Hey there, This is a wonderful series and actually convinced me to buy one. On the rear sight, was that center hole threaded? I know it’s been a long time since you wrote it so if you don’t remember that’s ok
LikeLike
Hello ! I’m sorry, I doesn’t have it any more and I don’t remeber…
LikeLike